Is a digital art frame right for you?

Are you thinking about investing in a digital art frame? Then this blog post is definitely for you. In this post I really want to dive a little deeper into the pros and cons of having a digital art frame and if it could be a good investment for you. The question is, is a digital art frame right for you?

What is a digital art frame anyway?

So, first of all, a digital art frame is not a new invention they have actually been around for years. However, in their earlier days, they were basically just low-resolution screens in the size of a photo. Even though it might be a nice feature to have a rolling picture collection of your family, the old frames were absolutely not good enough to display artworks. So after a year or two, the hype over product slowly faded into obliviousness.

In the recent footsteps of the development of the new smart TVs with full HD super-resolution, the digital art frames followed. Now there are even smart TVs that comes disguised as picture frames. I would definitely love a smart tv, if only they weren’t such a huge investment… 

If you want to buy a smart tv with the same resolution as the digital frame, you are going to have to put down a lot of money. That’s where considering a digital art frame comes into play. If you want is to display something beautiful with a lot of flexibility, then a digital art frame does just that but to a fraction of the cost of a smart tv.

At the moment there are many companies which sell digital art frames.
There are also new models coming up from many companies but some of the more established brands are:

Eos
Nimbus
Meural Canvas

What are the pros with this product?

What are the pros?

  1. Flexibility

    The first pro with digital art frames is definitely the flexibility. You can change up your decor or your art display every day if you would like. This makes the following new trends and changing up your home decor so much easier.
  2. Variety

    With a digital art frame, you have an endless variety or of new motifs and designs to choose from. A really nice thing about this is that you won’t get stuck with something you don’t like. 
  3. Money saver 

    Because a digital art frame allows you to display art that you can purchase digitally, that might mean that you could save a lot of money long term on individual pieces.

What are the cons?

  1. No collectors value

    Times are definitely changing and digital art has become increasingly recognized during the past decade. But one simple fact remains, a digital frame can never hold any collectors value because it is not itself an actual artwork. In contrast to a physical original artwork that might actually increase in value over time, a digital art frame is just and will always be a way to display art.
  1. No commitment

    The limitless options that a digital art frame offers can also be considered one of its flaws. For a person who is just starting out on their journey of finding their art style and favorite artists. I think that too much flexibility can halt the progress of getting to know your own individual style.

I am very intentional about what I bring into my home, I like having to make a decision and making a commitment. The process of narrowing down options and settling for an art-piece is important for me. It helps me define my style. 

Who would benefit from using this product?

Now that we know the pros and cons of digital art frames, then who are the people who could actually benefit from this? I think digital art frames could be interesting for a lot of different people, but here are some of the cases I came up with.

The creative professional

For creatives such as designers, artists and photographers investing in a digital frame is a chance to showcase artwork without any commitment.

Having a digital frame in a gallery or showroom offers a great opportunity to save some money long term. For example, a photographer might use a digital frame as a way to showcase their photographs to potential customers, without having to put down the expense of ordering printed copies. This would be an excellent tool for researching the demand for new products. Creative professionals would be able to get feedback from customers without having to make any commitments.

I also think a digital art frame could be used as a tool in the creative process. For instance, designers could use it to get a feeling for how prints or designs actually will look once they are printed. Seeing the design on the wall could also allow creatives to find and correct errors earlier in my creative process. Long term this might end up saving money because you can eliminate problems earlier in the process. 

I am actually considering a digital frame to use in my creative business, mostly as a tool for me to use in my creative process.

The art lover

If you have a genuine love for art where you just can’t get enough. I think a digital frame is a perfect addition to your home. There is something very appealing in being able to switch up your art display on a regular basis. 

I think that a digital art frame never will compare to or satisfaction and joy, an art collector feels from owning an original art piece. However, that does not mean that it can’t be a great addition to the art collector’s home. A digital art frame will let an art lover experiment with new styles and designs before actually making a commitment. For someone who already has a fairly good idea about what they like in terms of art, I think a digital art frame is a way to make experimenting more accessible.

The bachelors and bachelorettes

If you live alone chances are you live in a smaller space and when you live in a smaller apartment it is important with multifunctional items. I would have loved to have a digital frame in my first small studio apartment. Because there was simply not enough wall space to have multiple artworks. 

I also can’t help but think about the bachelors and bachelorettes I have met in my days. They could have really needed a digital art frame. Imagine being able to change your home decor depending on the guest.

  1. When you are alone with friends you might decide to display something quirky or personal. 
  2. When you’re with family you might show that “lovely” painting your 2 years old nice drew for you. 
  3. When you bring home a date or someone from work you might want to impress by displaying a classical piece.

It would be a game-changer!

Conclusion

In the age of smart homes, I really think that there is an appeal to having digital art frames in general. There are a lot of new companies coming up with Kickstarter campaigns and shortly there will be a number of new products launched. I’m very excited about this and I am waiting eagerly to see what happens.

If you need help finding art that you really love make sure to check out this blog article! If you want to get an update when I post blog posts like this then make sure to join my newsletter.
 
And make sure to check out all of my lovey art prints in the SelectedCraftsStore.

I hope you enjoyed this blog post, make sure to leave me a comment if you did!

How to prepare for tiny house living

Are you thinking about downsizing and moving to a smaller space? Then this blog post is for you! I’m currently moving from my two-bedroom flat in central Munich to a small 15 square-meter cabin in the woods. In this blog post you will find my best tips on how to prepare for tiny house living.

For me and my partner, moving to our small cabin in the Swedish woods is not meant to be a permanent solution. It is simply a way for us to save up some money while we are looking for a house for our future family. However, we still need to make a lot of changes in our lifestyle if we are going to survive some 7 months in the cabin. As you can see from the image above, it is TINY. So here are the things we have done to prepare for our tiny house living so far:

Downsizing and Decluttering

Downsizing and decluttering is essential if you are going to appreciate the tiny house experience. If you bring too much to stuff into your tiny house your life will most likely turn into a nightmare. Nothing takes away happiness like messy and cramped spaces.

Start with assessing your available space and how much you can actually bring with you. Start to purge your belongings and try to downsize as much as you can. Make sure to give away, donate or recycle the belongings you don’t need.

If you need help with this process I can strongly recommend using the Marie Kondo method. It is what I personally use.

Here are some of my best-decluttering hacks:
  • Remove unnecessary duplicates.
  • Remove clothes and makeup you haven’t used in the last year.
  • Sort through old papers and bills, consider scanning important papers and saving them digitally instead.
  • Take photos of old birthday cards and save them on your phone instead.

Fortunately, we are moving back to Sweden from Germany. This gives us an excellent opportunity to purge our belongings before moving in. Since both of us have moved frequently for the last couple of years, we haven’t actually had the time to build up a massive amount of stuff. But it is still way more than what we can fit in our tiny house. Since our tiny house experience is only temporary, some things including our furniture are going into storage.

We already try to be very intentional about the things we bring into our lives. But if you haven’t made a proper purge in some time, I would strongly recommend that you start your preparations here. Somehow you always have a lot more stuff than you think.

Properly assess the available space

So let’s face it, tiny house living means that almost everything has to go. So we decided to start with the things we simply cannot live without.

When you are assessing the space in your tiny house, see if there is a way to improve or maximize the available storage before moving in. In our case, the current bedframe only allows us to use one side for storage. So we are going to change to a bed to one that lets us utilize the entire space underneath it. We are also going to change the dining table, the new one will allow us to move more freely around the cabin.

Here is a list of what we each can bring to the cabin for reference:
  • 2 pairs of shoes
  • 1 jacket
  • 1 small bag with clothes (about 10 outfits)
  • 1 set of gym wear
  • 1 bathing suit
  • 1 toothbrush
  • 1 small toilet bag
  • 1 hairbrush
  • 1 book (or planner)
  • Smartphone
  • Laptop
  • Chargers

My goal is to ONLY have 3 boxes with us when we arrive at the cabin. Because after we fill up the cabin with the essentials there won’t be ANY space over. To give you an example of our available space. Then cabin is a total of 15 square meters, (that’s equal to 160 square feet). In the cabin, there is a total of 6 cabinets. Two will be used for clothing, one will be used as a pantry, one will be used for kitchen storage. That leaves us two super small cabinets that we will most likely be used to store kitchen appliances.

So farewell my regular sized closeth and bye-bye my beloved art supplies.

Another example from our situation is that I currently have a home office/ studio for everything related to the SelectedCraftsStore. Not a SINGLE thing from that room will make it into our tiny house. The challenge is real!

Organizing and planning

When it comes to organizing and planning for your tiny house experience more is better. If you are building your own tiny house remember that every inch counts. Plan out EVERYTHING, decide what goes into which cabinet from the start. So bulk up on space-saving hacks and try to find creative ways to maximize your storage space.

The house we are moving to is already very well fitted in terms of storage. But we still have to maximize the space.

One space-saving hack that we will be utilizing, is to store things vertically. For instance, we want to use every inch of our cabinets, but there is usually a lot of dead space at the top of a cabinet. So to utilize that we will use coffee mugs that you can stack on top of each other. This uses all the space from the bottom to the top of the cabinet, while also freeing up more space in the cabinet.

We will also store clothes and towels by rolling them instead of folding them. Although this might not necessarily free up more space, it will make it easier for us to access things. Tiny house living is intense enough without having to refold things every other minute.

Setting rules and mentally prepare

Going from a lovely two-bedroom flat to a tiny house will be a shock to the system no matter what. Therefore it is incredibly important to start letting go of certain items or habits that won’t work once you move. I think testing out to live with less for a while is a very good exercise. You can also check out the Netflix series Tiny House nation, they provide a lot of good pointers.

If you are going tiny with someone else then good communication is crucial. So we wanted to set down the rules early on.

For instance, hobbies have to give. As long as we live in a tiny house, hobbies need to be strictly limited. If you are planning of going tiny permanently, you have to figure out a dedicated space for your hobby supplies.

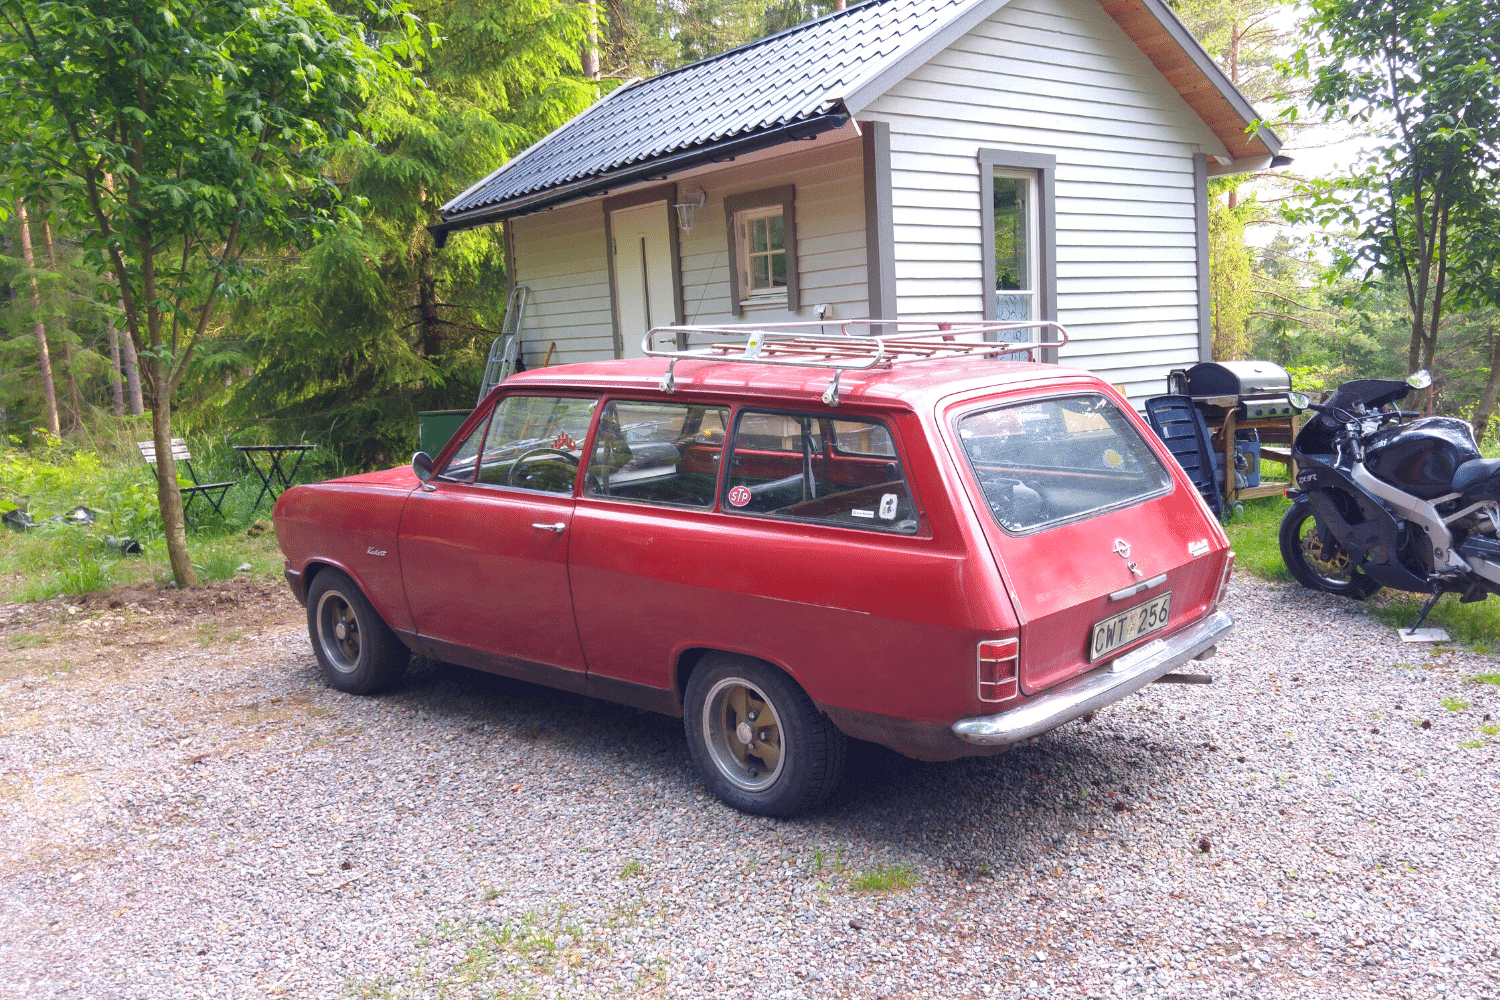
For instance, we both love to restore old cars but there will be a strict NO tool in the house rule. Also, I can’t fit my art and craft supplies in the tiny house, so I might have to focus more on digital art for a while.

A final thought on preparing for tiny house living:

With all of this said, we are preparing to move to a tiny house, but it won’t last forever. If we wanted to go tiny for life, we would have had to get rid of a lot more of our stuff like our furniture and porcelain. Downsizing is always a good idea and we aim to be fairly minimalistic. But someday we will move to a big house again and that means we have to deal with all the things we have put in storage. We also still have a lot of belongings to our parent’s houses. So we are very far from downsized yet.

To go tiny successfully I think you have to gain a ruthless mentality where nothing but the things needed for your survival fits into your life anymore.

Let me know if you have any other tips for tiny house living! Please let me know if you are thinking about going tiny as well. I hope you enjoyed this blog post!

Check out my other blog posts about home decor and DIYs here!
If you want to get updates about more content like this, consider signing up for my newsletter.

Home Decor Essentials

In this blog post, we will talk about the 6 home decor essentials that you need when decorating any room. In design, there are certain rules that help a designer achieve different effects. I believe it works the same with interior design and home decor as well.

You want your home decor to be a 360° package filled with intention and style. To achieve this you need layers and texture, a good ambiance, flattering lighting. You also need carefully selected decor that high-lights, frames and draws the eye of the beholder. On top of all this, it should still feel cohesive and relaxing. So where do you even start?

This is where the home decor essentials come in! I firmly believe that you always should start to decorate a room focusing on these 6 elements. I will also provide you with a useful home decor workbook at the end of this post to make these tips even more actionable for you. Let us dive right in!

1. Rugs and Carpets

A well-chosen rug can change the feeling of an entire room. It helps to define the room and can be used to separate different areas of a room. A rug under a sofa and side table helps to anchor the furniture in the room. In an open kitchen and dining area, a rug under the dining table helps to separate it from the rest.

So naturally choosing the right rug is a very important decision. You want to think about color, shape, size, and texture. There are a lot of things to take into account but at the end of the day, you should go for a rug that you really love. However, I still want to give you some helpful advice when purchasing a rug.

Color

A rug should be among the first things you invest in for a room. A large rug for the kitchen or living room should complement the rest of your interior. But don’t be afraid to try a colorful or patterned rug since it is one of the first things that goes into a room. A rug can really bring definition to your decor and you can always blend it in with other elements later. I love the Scandinavian and minimal interior style. I like neutral colors and soft patterns in a rug, I find that it elevates the rest of the room.

Size

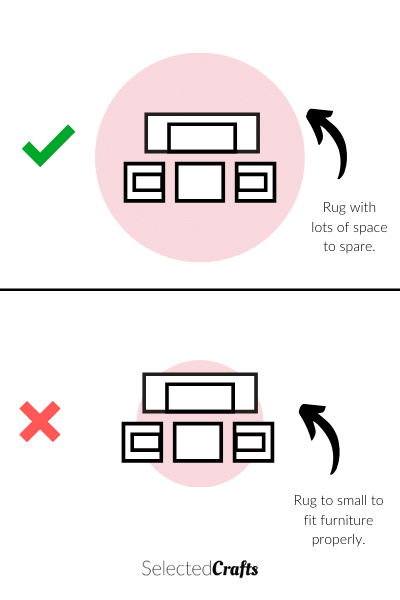
The size of the rug is probably the most important thing to consider. It is when choosing the correct size of a rug most people go wrong. A rule of thumb is that bigger is always better. You want a rug that fits all the furniture pieces you want to frame with room to spear.

Big rugs can be very pricy, so you want to make sure to take down the exact measurements before you go shopping. Depending on your interior style you could also consider layering rugs to allow them to cover a larger surface.

Shape

The most common rug shape is the rectangular rug but when choosing a rug you want it to mirror the shape of the room. A rectangular rug in a rectangular room looks really good. But in a square room, it will look better with a square or circle rug. Going for round or uncommon shapes, like cowhides, can be a really good way to soften the edges of the room.

Texture

Lastly, you want to consider the texture of your rug. My best advice would be to look at what functionality you need from the rug. Though it might be tempting to always go for long soft fibers in every room. It might not be very functional. Rugs with shorter fibers will be a lot easier to clean and take care of. Another option is to go for rugs in materials like plastic or reed. Choose a rug with a texture that is the best match between luxury and maintenance.

2. Curtains

Choosing the correct curtains for your space is also very important. I really feel that curtains are essential to any decor because they can make your space feel instantly decorated. Curtains can make or break a space.

You should take a good look at your window and decide where you should place the curtain rod. If you place it to close to the window, the curtains might actually make the window appear smaller. You might want to consider moving the curtain rod all the way to the ceiling. This will make the window appear bigger.

Once you have your curtain rod in place, you want to measure the length from the rod to the floor. If you know your measurements you won’t risk buying the wrong length. The correct length will instantly look better, a too-short curtain will end up looking misplaced. As with rugs, the general rule should be that longer is better, you can always adjust the length later by sewing or using an iron-on-edge.

When it comes to the color and texture of the curtains there are really no rules. Sheer and light curtains will let in more light and might be better suited for a living room or kitchen. In the bedroom, you might want to consider a thicker fabric that blocks out the light instead. Go for curtains that feel cohesive with the rest of your home decor.

3. Lamps and Lighting

Nothing makes more difference than having good lighting in your home. If the lighting is too bright, in the wrong color, or just not efficient enough. It will make the rest of the room look bad no matter how good the decor is. If your existing light fixtures aren’t working for you, consider changing them straight away.

The ceiling light should be bright enough to let you go about your day with ease. In certain spaces like above a dinner table or a coffee table, you want to go for big statement pieces. Lamps and light fixtures are an excellent way to let your style shine through.

You should also consider adding decorative lamps for sensory purposes. You can use smaller table lamps, floor lamps or even string lights if you want. It is important to be able to adjust the lighting throughout the day. I find that I unwind a lot better in the evenings if I use table lamps instead of spotlights when it is dark outside.

4. Plants

Having plants at home improves both your home decor and your health. Plants are fairly inexpensive which also makes them great to decorate with.

When it comes to choosing plants consider your space and how much sunlight that filters into that space. Consider who much time you spend at home. There is no idea to buy plants that need a lot of water if you can’t be there to take care of them. If you live a busy life plastic plants are a good compromise, even though you might miss out on the health benefits. Another way is to use cut flowers, they might not be as affordable long-term but they definitely bring the same benefits.

Finding out what plants work for you and your lifestyle might take a while but I promise it will be worth it.

I personally prefer low maintenance plants like Succulents and Cactuses. I can also really recommend the plant called Peace Lilly. They are virtually impossible to kill and are perfect in a bedroom since they are really good at cleaning the air.

5. Artworks & Wall Art

I guess art is the ultimate home decor essential. Art might not have the same functionality that a rug or storage has. But art is absolutely essential to make space feel personal.

Different interior styles dictate different use or art. One general rule is to focus on a few statement pieces. You should also think about the space where you display art, it should feel intentional and balanced in size and form.

There are so many things that you can decorate with, posters, art prints, canvases, wall hangers. The options are endless. You can check out this blog post about how to find art you love if you need help getting started. Or you could check out this blog post about how to find art for every room in the house.

6. Decorative Storage

Lastly my personal favorite home decor essential, decorative storage. Almost all of us, despite how much space we have, are faced with the issue of clutter. Clutter is a homewrecker. It doesn’t matter how pretty your paintings or throw-pillows are and it won’t matter how many times you clean if there are things everywhere. Clutter instantly drops the overall feeling of a space.

I have first-hand knowledge of this because it took me years to figure out the difference between cleaning and organizing. Good organization means that you spend less time cleaning.

Decorative storage is a way to organize everything in a way that is more pleasing to the eye. As a storage junkie, my recommendations for decorative storage to start with would be baskets, boxes, trays, and plates. If you are starting from scratch you should focus on baskets and boxes first. That way you can hide the clutter and keep it organized at the same time. When your organization improves and the worst of the clutter is eliminated, you can move on to decorative trays and plates to make your space look more intentional.

Why are these items the home decor essentials?

These are my thoughts on the topic of home decor essentials. I like to keep things short and to the point. The list could naturally have been much longer, but this list is the items I keep returning to when I decorate. I have lived without all of these items from time to time. Now because I have tried a lot of different options, I feel like these are the things I refuse to live without. The home decor essentials are the things that have had the most positive impact on my home decor.

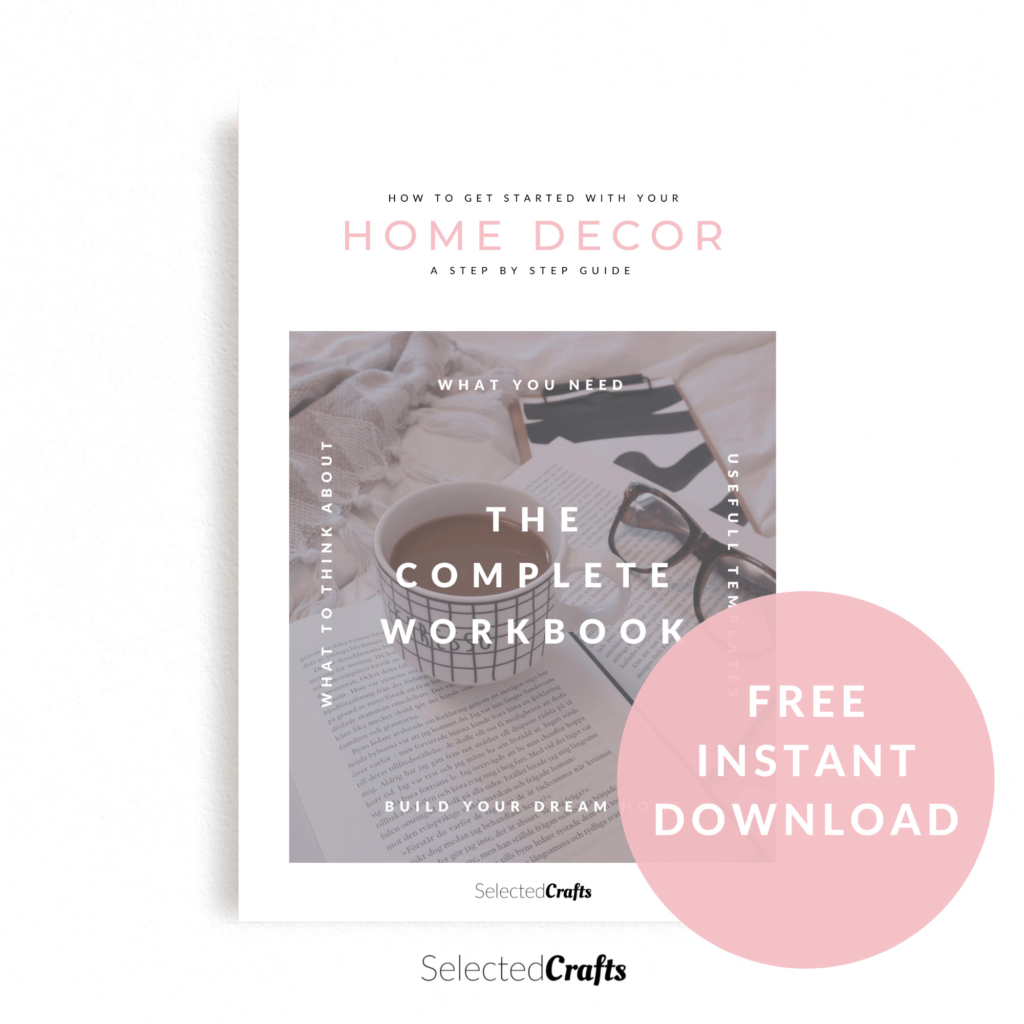
Make sure to grab your FREE Home Decor Workbook and to help you get started with your decorating project right now!

Home_Decor_Workbook


What do you think about the list? Did I miss anything? Please tell me what you think in the comments, I would love to hear your thoughts!

If you want to read more posts like this one you should check out my other home decor guides!

If you want to get an update when I post content like this, make sure to sign up for my awesome newsletter!

Have a great day superstar!

5 things I wish I knew before I started my business

In this blog post, I want to tell you about the top 5 things I wish I knew before I started my business and brand SelectedCrafts.

I never thought that building a business was going to be a walk in the park. Neither did I expect how much time and effort that goes into every little part of a business.

My mission is to build a beautiful life that I love. Starting a business was a very important part of achieving that for me. I still consider myself to be very early in my journey, but there are definitely things I wish I had known before I started SelectedCrafts.

5 things wish I had known before I started my business SelectedCrafts

1. Building a business is a slow process

When I say that it is a slow process, I don’t mean that I was surprised that it would take time to build a business from scratch. I was aware from the start that there would be an endless to-do-list of ideas and not nearly enough time to do all of it. But in my vanity, I thought that this would be easily resolved if I was just really tough with the prioritizing and planning of my time. I do pride myself on being fairly structured and organized.

But the problem is fundamentally not a lack of structure. Life as a business owner includes a lot of unforeseen challenges. My day-to-day life includes a lot of unplanned on-the-spot problem solving which takes up huge portions of my time. There is also no amount of structuring or planning, that can remove the amount of time you need to spend on mapping out the direction of your business. Those desitions take time to reach and they should, it is the future of the business we are talking about.

In my opinion, I’m not spending time doing the wrong things or being unresponsible with my time. I think business-building is a very slow process. If I had known that from the start I might not have pushed myself so hard in the beginning. I wish I had known before I started how much time I would end up spending on every…single…detail. 

2. Building a business is frustrating

I expected that there would come times when I felt frustrated and had trouble to overcome my obstacles. Somehow I thought that the frustration would be directed outwards. I thought I would feel frustrated over things beyond my control. Things like waiting for answers from authorities or needing system support. In reality its the exact opposite, I direct all the frustration inwards.

I offend get feelings like; my business isn’t growing fast enough, my designs aren’t good enough or that my business idea is a disaster. All of these notions change my mood in some way or another. I can get extremely impatient and I compare myself too much. Sometimes I struggle to see my learning-curve as anything other than a big failure. If I didn’t work on preventing these feelings every single day they would probably get the best of me.

Every day I remind myself that my journey is not like anybody else’s. to build tools to help me cope with frustration. I surround myself with a loving group of friends and family. I tell myself to not compare my beginning with other people’s middle. In all manner of ways, I try to build a healthy lifestyle.

In the end, it will be worth it, I might currently be moving forward in a somewhat frustrating slow pace. But like in the fable with the turtle and the hare, I’m sure that slow and steady will win the race. I’m not going to compromise the quality of my products or the quality of my brand.

Although I wish I had known in advance, how much of the daily range of emotions, that would be frustration.

3. There’s a reason to why it exists so few home decor blogs

This might be a more practical point, yet it is one of the things I really wished I had thought about before starting. Before I decided to set up my brand or this blog.

The reason that almost nobody writes about home decor and interior design, is because it takes time and is expensive. It takes a humongous amount of time to make quality content. In order to make home decor and interior content that’s interesting for readers. It needs to provide an extraordinary value, be to-the-point and include breathtaking graphics. It’s not impossible to provide that, but a business owner’s hours of the day are limited.

I remember a class in university where we studied interior photography. Being in a Swedish university the examples were naturally from the Ikea catalog. We had a discussion of the composition of the image. At the end of the class, we were asked how much money we thought was needed to produce a full-page image. Just one image out of hundreds in the Ikea catalog. Apparently close to 100 000 dollars/euros, though that’s was some years ago now.

For some reason, I didn’t think about this fact when I started my blog. As you might have guessed, I don’t have the equipment, knowledge or money to produce Ikea-quality images. Photography is probably the main reason that there are so many blogs about the topic of blogging because it lets you reuse your existing images.

I worry about the quality of my content a lot, but I have decided to not let that stop me. I will do my very best to provide value for my readers and customers. As I learn ways to improve my writing and design it will get better. I can always go back and improve things later. The most important thing is probably to keep moving forward, learning new skills, testing new ideas and perfecting my craft.

4. A brand voice won’t magically appear

I have worked in media and marketing and I know how long time it takes to find a brand voice as it is called. That’s the thing a business gets when there’s a clear idea about what makes their product special and how the branding is going to look. A company with a defined brand voice will also have marketing and development strategies in place.

I knew that building a brand from nothing was going to take a long time. Secretly I still wished that I would be the exception when I started. I hoped that my products would somehow be perfectly designed, for my ideal customer and that they would go viral overnight. Even though that did not happen, I think that wish for instant success was important to get me started.

SelectedCrafts has a long way to go. There are still a lot of questions and obstacles to overcome before I can reach the destination of a fine-tuned brand voice.

I still secretly hope that SelectedCrafts will “take off ” one day but instead of wishing for it I’m working towards it.

5. You need to invest before you delegate

Before I started my business I told myself that I would be a smart and responsible business owner. I told myself to work “smarter not harder” and that I would delegate work if I had the opportunity. The only problem is, you need to pay for that.

Delegation of work was one of the more romantic ideas I had about starting a business. Initially, I failed to see that before a business starts making continuous sales and income. Delegation simply is not an option. Before delegation comes investing. Even if you run a 100% pure online business, investing in the proper tools are expensive.

My starting budget for this company was modest. I thought I would keep too free tools and options in the beginning. I still do in some cases. The only problem with free tools is that you simply won’t get the same quality as with paid solutions. In some cases, I just had no other option than to invest in the proper tools. I need the tools that let me provide the level of quality I want to provide.

Right now I still have investing to do, before I reach the level where I can pay to delegate parts of my work. I have become painfully aware of the time vs money dilemma. You just can’t have both when you start out unless you have a crazy start budget. Quite frankly I think it will take years before I can start delegating. I still need to use any profit I gain to invest back in my business.

I wish that I had a better understanding of this when I first started out.

Final thoughts

I went into the whole starting a business process as open-minded as I could bring myself to be. Even though there are certain things I wished I had known before I started. Not knowing can also be liberating in a sense.

I think problems exist in three states:

  1. When you know, that you know.
  2. When you know, that you don’t know.
  3. And lastly, when you don’t know, that you don’t know.

For instance, I know I have to add my receipt to my bookkeeping. Here I know the problem and the solution. I also know that I have to research how to set up a Youtube channel. In this case, I know the problem but not how to solve it yet. Lastly, are the things I simply don’t know will become problems in the future. I can’t really plan for that.

If I could have foreseen the obstacles I would run into, I think it would have made me feel disheartened. When I go back to this blog post a couple of years from now. I’m sure there will be other things I wished I had known today. But I much rather keep going forward and face each situation as it appears.

I hope you liked these blog posts if you are interested in more like this one head over here!

Don’t forget to check out my art printables in the SelectedCraftsStore.

The pros and cons of buying printable art

In this blog post, I just wanted to address a topic that might have crossed your mind as well. I am thinking of the pros and cons of buying printable art. There are naturally pros and cons of any product. But in this blog post, I want to share my insights as an art printable seller regarding the digital download format.

Being a business owner means that you need to have an understanding of the products you make and sell. The pros are naturally important to know since it is usually the argument for selling. The cons are equally important because that is what you need to improve and overcome on behalf of your customers.

This is what I have learned so far!

The pros and cons of printable art:

The pros with printable art:
  1. Lower prices
    One of the most obvious pros with the digital download format is that it has a lower price than a physical print. Since it requires the customer to solve printing at their end, it means that sellers can keep their prices down. This ultimately means that customers can get printable art at bargain prices.
  2. The convenience
    It is called an instant download for a reason, the convenience is a major pro with a digital download. If you ever have felt stuck finding the perfect motive for a room or for a gift, imagine you finally find it! But then have to wait a month for shipping… With digital downloads, you can get what you want, exactly when you want it, without having to leave your couch.
  3. More options
    There are so many options with digital downloads in terms of colors, sizes, and customization. Customization and offering variations of printable art can usually be made in a day or two. Compared to making changes in a physical product that usually takes weeks to make available. The option to make a design that fits the customer perfectly is a huge pro with the digitally downloadable format.
The cons with printable art:
  1. Technical knowledge
    Printables and digital downloads are not products that have been around for very long. One of the biggest cons is the fact that the product format requires the customer to have a certain level of technical knowledge. It means that a whole potential group of customers who may like my designs might be lost to me for this reason alone. For me, as a creator, it means that I really need to make sure that my customers know that I will be holding their hand all the way through a purchase. I will also have to do my very best to provide useful technical guidance in every step of the purchase.
  2. Printing
    A lot of people might be turned down by the idea to buy a digital print that you then have to print yourself. Part of the idea with digital downloads is for the customers to take action themselves, but is definitely not in everybody’s interest. I think a lot of people expect a finished product. This is why I am starting to provide my customer’s whit dropshipping and printing options in my shop.
  3. Quality
    There is an ocean of art printables and digital downloads out there, as amazing that might be in terms of diversity, there’s also A LOT OF TRASH out there. It can be very difficult to separate the trash from the treasures. Some products are in a poor resolution that prints like crap, while other so-called “handmade” or “original” items are not even made by the person that sells them. I decided way before I made my very first printable, which kind of creator I wanted to be. It is very important for me to make 100% of my design myself and that the quality should be so good that they exceed my customer’s expectations.
Finally thoughts:

With art printables and digital downloads, it all comes down to knowing who your buying from. As easy as that sounds it can actually be quite difficult when buying on marketplace sites. I know a lot about this as an Etsy seller and I call it the “marketplace dilemma”. I genuinely believe that most people want to know the person they are spending their precious money on. Although customers are not always aware of who their buying from. That’s not always an issue, at least not until you buy from someone who sells crap quality. When asked the question “where did you get that?”, for better or worse, most customers will simply answer “On Etsy”.

For an Etsy seller that is devastating when a customer comes across low-quality design because that customer might never consider buying an art printable again. Or even worse they might stop using the marketplace entierly.

So I just want to finish with a quick takeaway, to make sure you got everything you need to navigate the jungle of digital downloads.

When buying digital downloads:
  • Look for PDF-files that prints in at least 300 DPI.
  • When buying clip-art get PNG’s as separate elements, with transparent backgrounds.
  • Read the product descriptions, a caring seller will provide you with all the information you need and want.

Do you agree about the things I have pointed out? If you have any thoughts about this topic feel free to reach out!

You will find my designs on Etsy in the SelectedCraftsStore!
Or here on my blog in the shop section.

Have a great day superstar!

Make Christmas Yarn Bird Ornaments

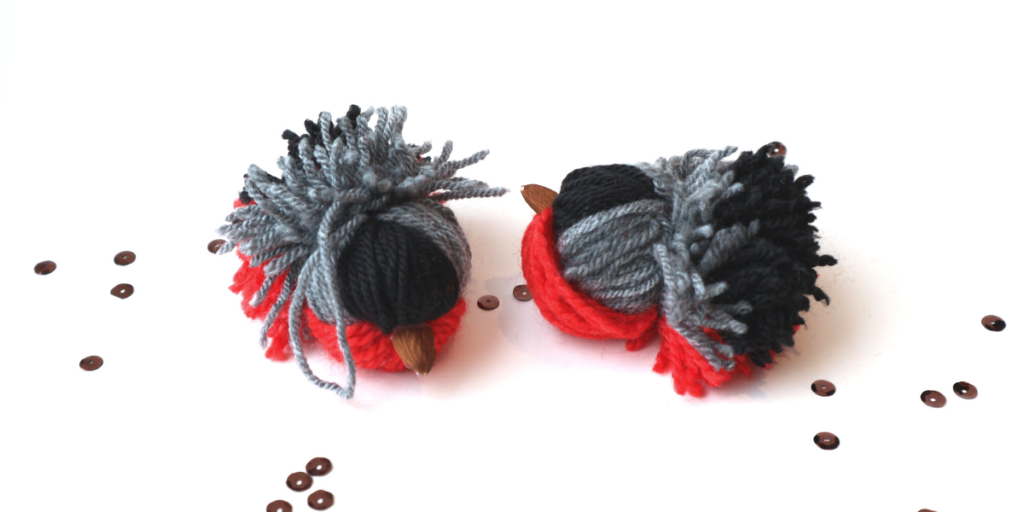
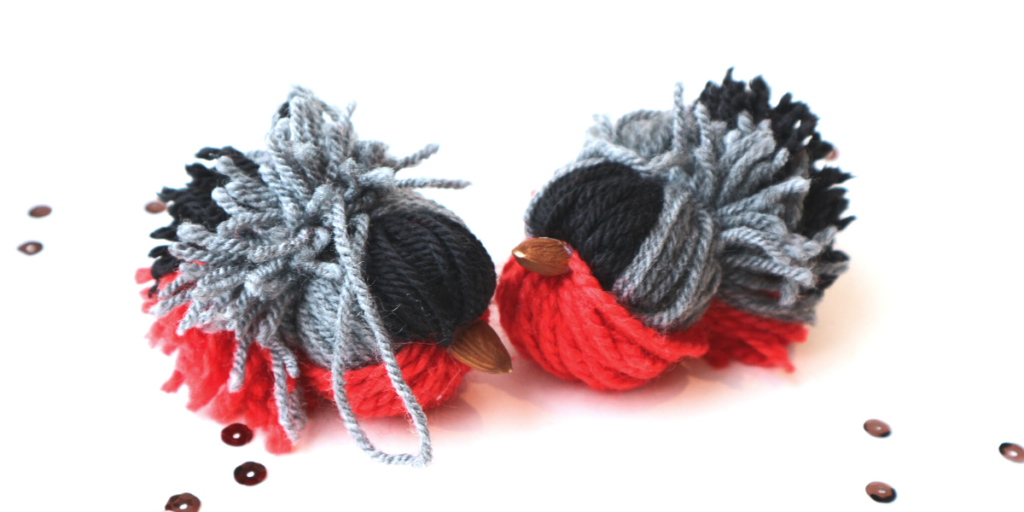
In this blog post, I will show you how to make these adorable Christmas yarn bird ornaments. This year there has been this trend about making homemade, fairly traditional Christmas decorations. That’s when I remembered this simple and funny craft I used to do back in school.

These ornaments will be a gift for my grandmother and she loves Bullfinch birds. But there is a lot of other bird types you could make with this DIY. I had a vision of cute fantasy-birds in pastel colors, maybe a DIY for next Christmas.

Supplies

Red yarn (weight 60)
Black yarn (weight 60)
Grey yarn (weight 50)
Almonds
Metal wire or Glue

Tools:

Scissors

Christmas Yarn Bird Ornaments

Instructions:

Christmas Yarn Bird Ornaments
  1. Start by making 3 equally long yarn bundles, one in each color. I used a notebook as a reference, it was 15cm (6 inches) wide.

2. Align the black and red bundle and tie a firm knot around the center or the bundle.

Christmas Yarn Bird Ornaments

3. Fold all the black yarn left from the center and tie another firm knot. This will become the body of the bird.

4. Lay the bundle of grey yarn underneath the remaining red bundle and fold the red yarn underneath the grey yarn. Tie another firm knot to secure the red yarn. This will form the belly of the bird.

5. Fold the grey yarn upwards towards the back of the bird and try to create a V-shape. Secure it with a firm knot. Trim any excess yarn to a shape that you like.

If you want to use the birds as ornaments, add a small loop of yarn to the knot at the back to create a hanger for the bird.

6. Lastly, make a beak by cutting an almond in half and thread it on some metal wire. I used glue to secure it. If you don’t have metal wire, I think it would work fine to just glue the almonds directly to the birds.

Tada, now we have Christmas Yarn Bird Ornaments!
Christmas Yarn Bird Ornaments

Let me know what you think and I would love to see the result if you decide to make yarn birds of your own!

If you are looking for more crafts like this one check out my other blog posts here!

Consider joining my email list if you want to receive updates when I make other DIYs like this. You can try it out here!

Happy crafting my superstars!

How to build a simple bike stand for your garden

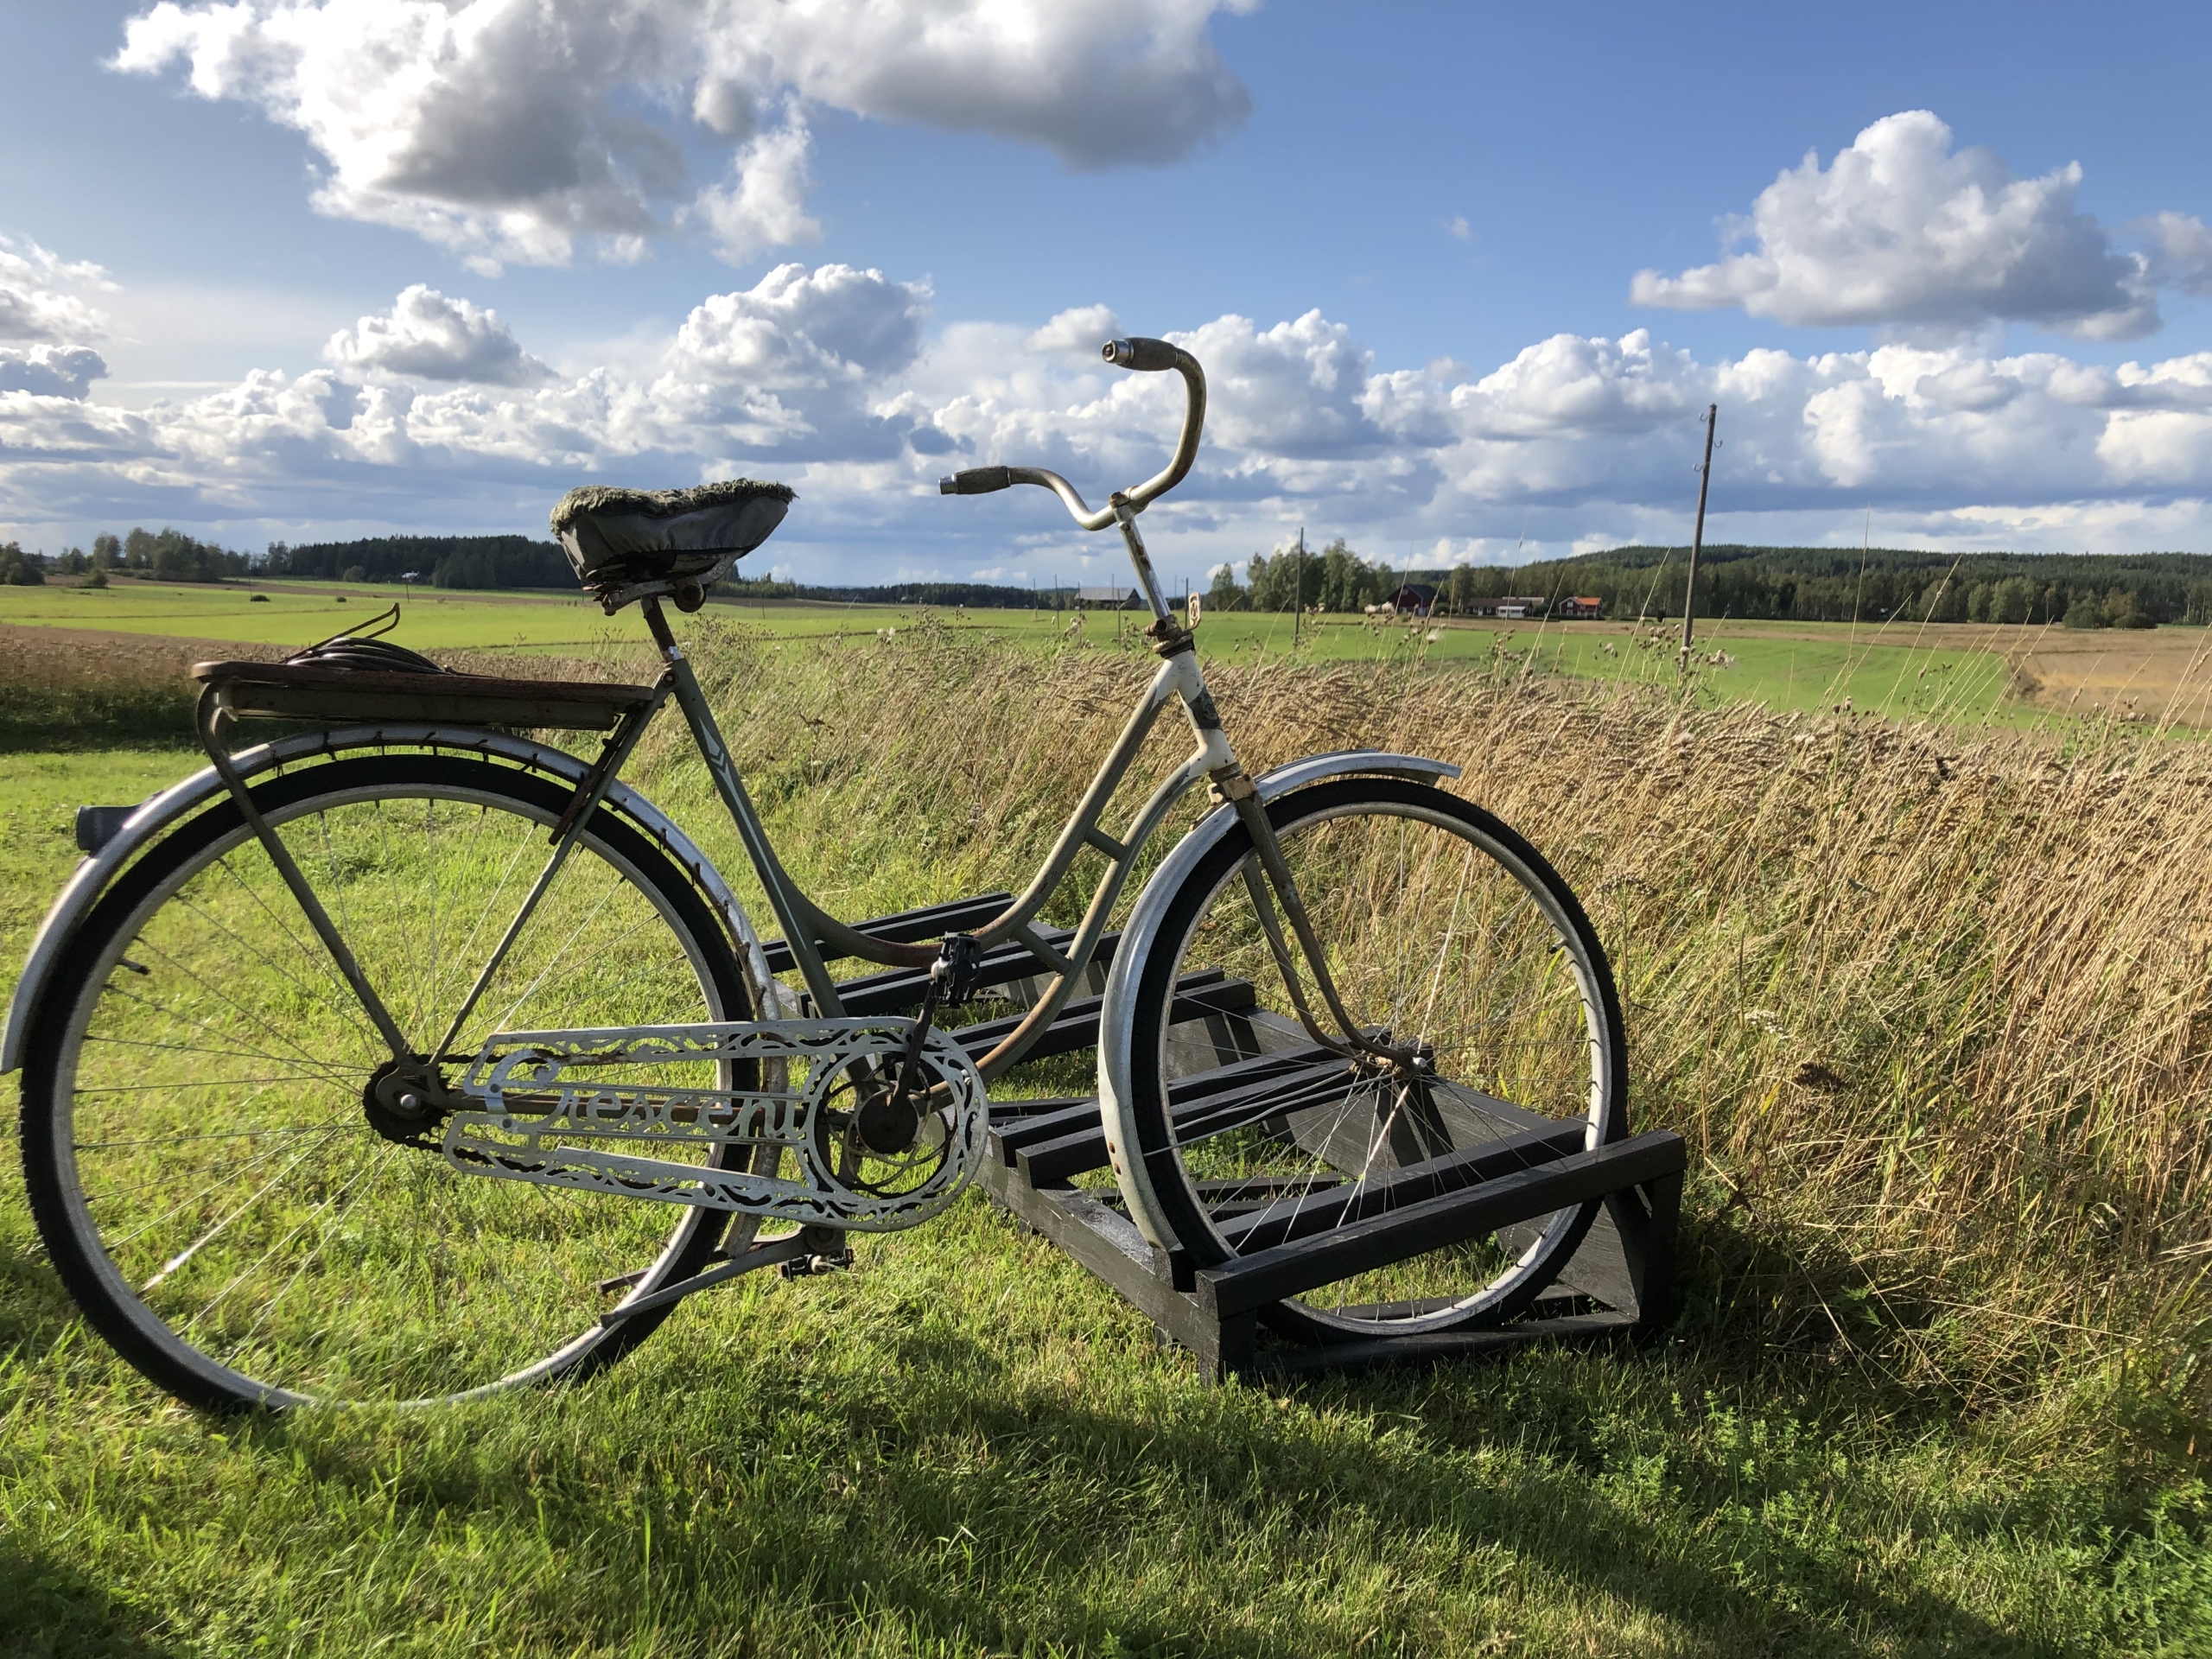
Need an affordable way to store all of those bikes? Then you’re in luck! Because I have made instructions for this easy to build, super stylish bike-stand. In this blog post, I will take you through how to build a simple bike stand for your garden step-by-step.

Before you start building your bike stand

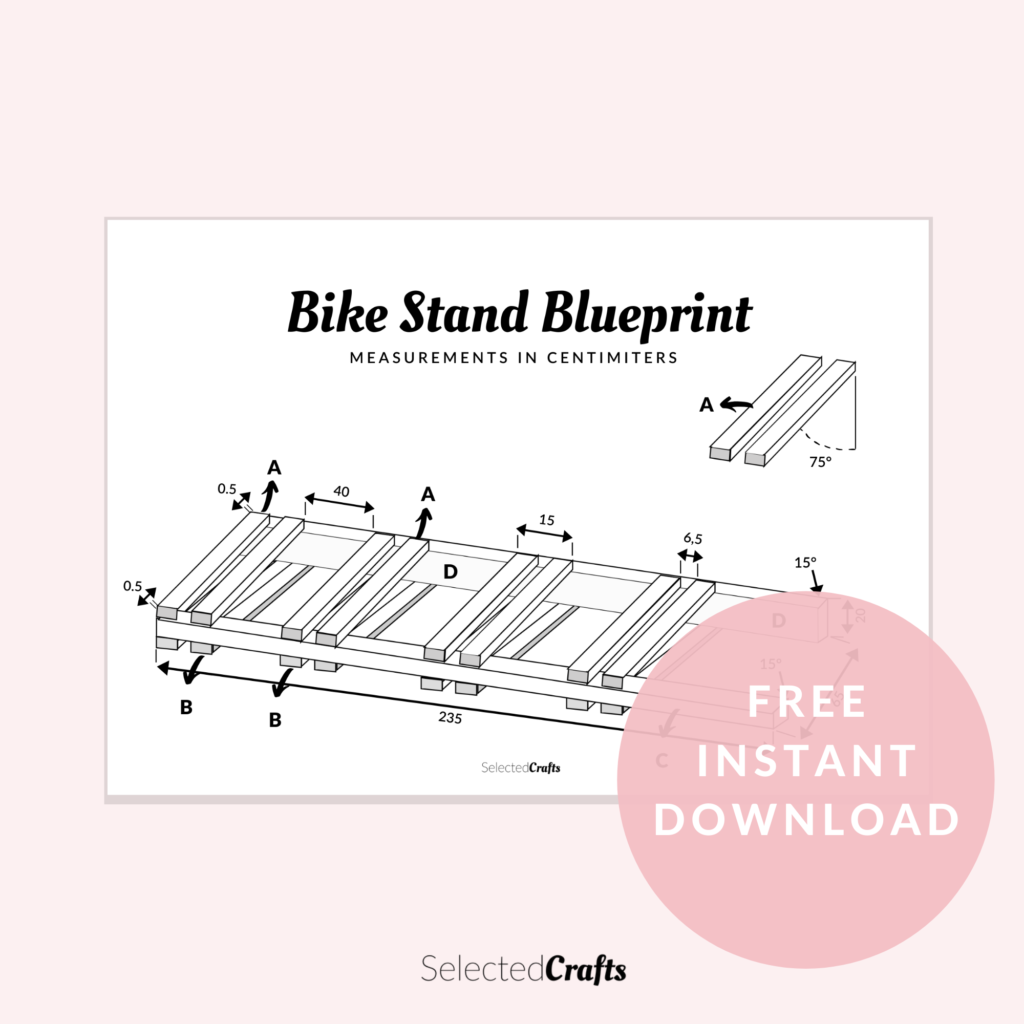
Gather all the tools and supplies needed as listed below and make sure to print out or download the blueprint for the bike stand.

I have specified all measurements to the best of my ability but please keep in mind that I use the metric system, please doublecheck measurements in Inches.

Supplies:
  • 10pc, 6500mm, 45x45mm (US: 25,5 inch, 2×2)
  • 10pc 6800mm 45x45mm (US: 26,7 inch, 2×2)
  • 1pc 2,35 meter 45x70mm, (US 92 inches, 2×3)
  • 1pc 2,35 meter 45×200mm (US 92 inches, 2×8)
  • 1 bucket of oil-based paint for outdoor purposes
  • Screws size 45×70 mm
Tools:
  • Saw (preferably a gear-saw or circle-saw)
  • Screwdriver
  • Wood drill
  • 2 wood clamps

Note: Be careful while using power-tools and consider asking a friend or family member to help you out. Always put your safety first, consider using a pair of gloves and glasses for protection. Gloves also save you from getting paint everywhere. 

All measurements in inches or us sizes will be displayed in (xxx) format.
Instructions:
Measure wood for bike stand

1. Start by measuring out and cutting all the wood pieces to size. I borrowed a gear-saw for this project, but a regular saw will work just fine.

measure wood for bike stand
  1. Mark out the lines on the 45x70mm (2×3) and 45x200mm (2×8) pc, for were for the 45x45mm (2×2) will go straight away. This way you will make sure you got the measurements right from the start and it will save you time later. As my father-in-law always says “Measure twice cut only once”.
measure wood for bike stand

2. If you have a gear-saw available, use it to cut a 15° angel on one side of the 45x200mm (2×8) and the 45x70mm (2×3) wood pieces. This will add some extra stability to the bike-stand. Whilst cutting one, use the other as your reference by pinning them together with two wood clamps. This way you will make sure to get a straight cut.

cut wood for frame

3. To do this set your circle-saw to 15° and make a test cut to see if it working correctly. You want the cut to be right on the corner of the wood. As you can see in this image I failed my first attempt, the cut was much too high and missed the corner. So I did an additional adjustment and then it worked perfectly. 

Time to put everything together!
drill holes in wood

4. Pre-drill the bottom and top edge of all the 20, 45x45mm (2×2) pc. Use a screwdriver and a wood drill in the same size as your screws. Make sure to not make the holes more than 45mm (1.5inch) from the edge, so the screws actually have something to grip. I just did two diagonal holes on each side of all pieces. This will allow screws to get a much better grip and will make the overall structure steadier.

diy wood frame

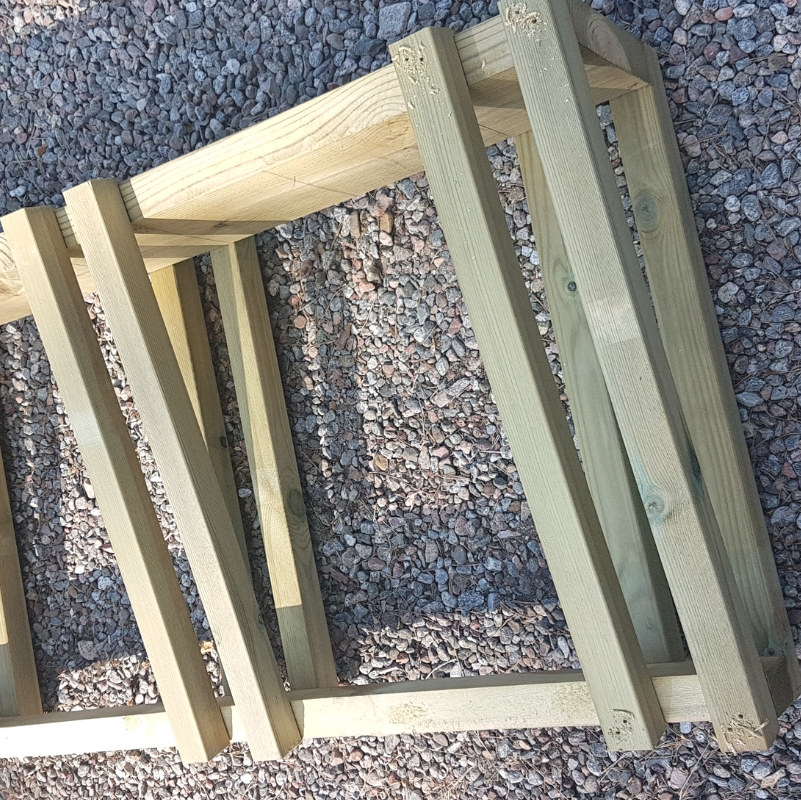
4. Attach the 6500mm (25,5) pc to the back (the side without an angle) of the 45x200mm (2×8) and 45x70mm (2×3) pc. This will form the bottom of the bike-stand. The 6500mm (25,5) pcs should have a 65mm (2,5) space between them, this will accommodate most bike tire sizes. Also, make sure that both the angles on the 45×200 (2×8) and 45x70mm (2×3) are facing the same direction before you start screwing it together.

I had some trouble getting things to stay still until I had attached my first pieces, so consider garbing a friend or family member to help you out.

Build a simple bike stand for your garden

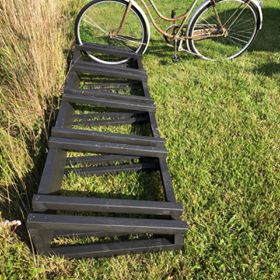
This is how the bottom should look like once all the 6500mm (25,5) pc are screwed into place.

bike stand frame

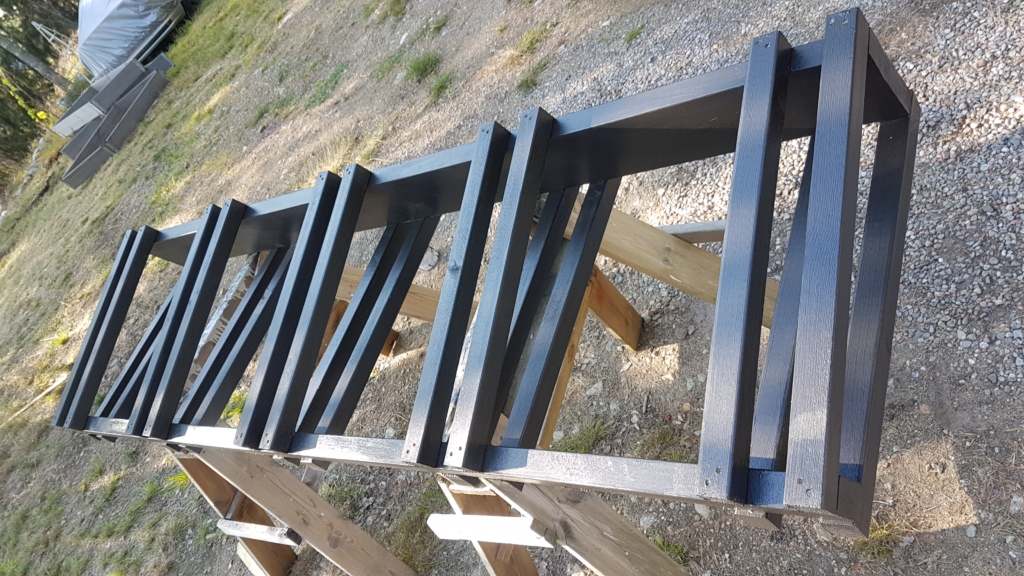
5. Flip everything over and attach the 6800mm (26,7) pc to the front (the side with angle) of the 45x200mm (2×8) and 45x70mm (2×3) pc. This is the top of the bike-stand. The 6800mm (26,7) pcs should have roughly a 50mm (0.2inch) overlap, on both the top and bottom edge of the 45x200mm (2×8) and 45x70mm (2×3).

Voila! Now you have a bike-stand.
Build a simple bike stand for your garden
caparol paint for bikestand


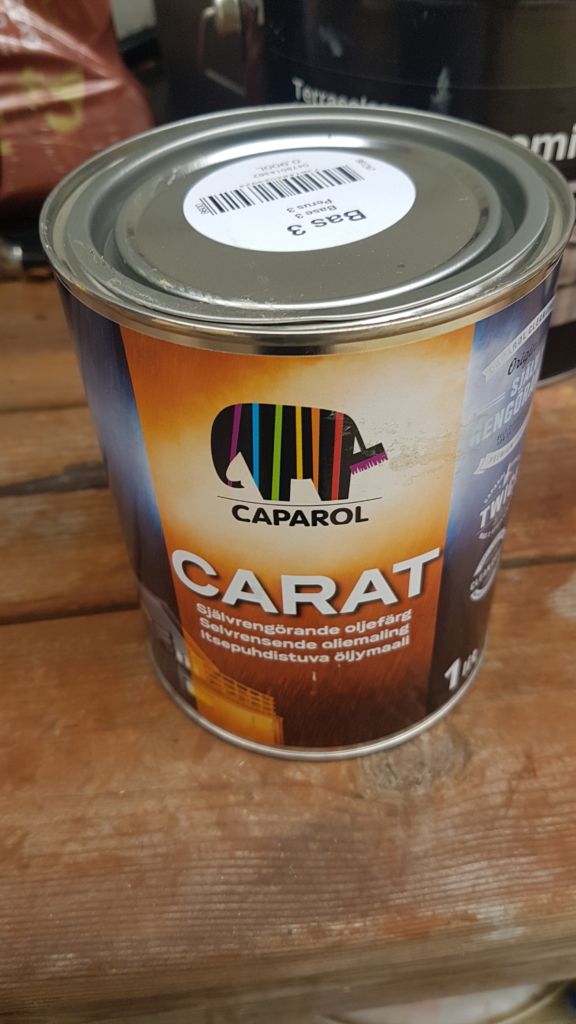
6. Now its time for painting, I did two coats of an oil-based outdoor paint from Caparol. The color is called natural black and I am SUPER HAPPY with both the shade and the overall result. I strongly recommend it!

About Paint!

If you should spend money on anything, spend it on paint that is mold-resistant and will make your build able to survive outdoors for many years.

I also really recommend talking to your local paint shop to get advice. Usually, they have a lot of discounts so the price usually competes very well with larger brands AND you get the benefit of expert advice.

Once the paint is completely dry, in my case after 10 hours, you have a stunning-looking super-useful bike-stand. Enjoy!

Bike Stand
Build a simple bike stand for your garden
Reflections

LOVE my new bike-stand! I think my family does as well, it means the bikes no longer rust away in the grass in the garden. There’s definitely a good chance that I will make another one like this in the future.

The garden looks tidy, the bike-stand looks professional AND it saved me tons of money. I expect the total cost ended up around 50 euros/dollars but most of that is for paint. I definitely think you can press the total price even more, especially if you do your research and shop for paint when there is a sale or offer. For me, it is no brainer to choose quality paint so that the build survives a couple of years.

Get the FREE plans for this bike-stand here!
Bike stand blue print

The best part? I give away these plans for this amazing bike-stand for FREE! Download the plans right HERE!

Let me know if you have any questions. If you go on and decide to build a bike-stand of your own, I would LOVE to see the result!

Check out more builds like this one here!

Have a great day superstar!

How to find art that you really love

In the blog-post, I want to give you some guidance on how to find art that you really love. I want to make the topic of choosing “art” feel more approachable.

What is good art, what is bad art and who am I to decide? I am in no way capable or qualified to answer this question. But I do know one thing, the important thing isn’t whether or not something is good or bad. It’s to know whether or not you like it!

I think a lot about what art is. Not only because I run an art printable business, but also because creating is a huge part of who I am. I spent years in the university contemplating what design is, so I have thought about this topic a lot.

When you talk about art you typically refer to visual representations of art. But with that said, having “art” in your home can apply to many other forms of expression. It can be as simple as having an LP or CD with your favorite song. Or a lamp that casts interesting shadows and sets the mood in a room. Art is a fleeting term and it would not make any sense to limit what it can or can’t be.

I know that finding art that you love can be really difficult! Some lucky people don’t seem to struggle with this at all. I think that maybe because they struggle less with who they are. Finding art you love is essentially a journey in finding yourself.

To get you off to a good start on this journey I have created this blog post. If you want to find art you love you should ask yourself these 5 questions:

1. Does this make me feel something?

This is a bit of a cliche, but isn’t art fundamentally about what it makes you feel? It doesn’t really matter what feeling is, it can be sadness, happiness, anger. Although you probably want to go for the happy art pieces if you intend to use it in your home decor. Art that makes you feel angry or sad can also give you a good indication of what kind of styles you like.

It’s also important that you don’t sell yourself short, you don’t have to deal with antiquities to be an art expert. You don’t have to know every trend that’s going on, you only have to be an expert in you!

2. Does it amplify who I am?

Art should be an extension of yourself. If you have a special interest that is very important to you like food or dancing, then finding art that extends that interest in your home can be a great way to go.

Art can also represent a value that is very important to you. If you care a lot about the environment, women’s rights, or fighting poverty. Then art centered around your core-values can really bring a sense of who you are into your home decor.

Don’t worry if the things you like don’t always match or look the same, that is also a form of your self-expression. I have restrained myself from buying things I really liked in the past because they were “the wrong color” or the “wrong aesthetic… that is just nonsense!! For me, it’s way more difficult to find things that I really love, than to incorporate them into my home decor. I, for example, love the Scandinavian down-to-earth minimal design, but it is not the only thing I like. I can really like cute a kawaii-anime-style poster and I have started crying in front of classic oil-paintings in the Louvre *True story.*

So if the art you like is a bit messy that does not have to be a bad thing, humans are messy and therefore art is messy!

3. Can I turn it into art?

What if you found something you really like the look of but it wouldn’t traditionally be considered as art. Are you going to let that stop you?
The definition of art according to the internet is “The expression or application of human creative skill and imagination.” This means that literately ANYTHING you can think of can be art if you want it to be. Try to challenge your own view of art is supposed to be.

For example, I have a friend who has parts from a car engine on display in his living room. That is so cool and personal! Sometimes it is easy to think that art has to be a painting or a sculpture. When really anything that speaks to you can be art.

There are no rules for what you can or can’t do in terms of art, although if you want to display a really avant-garde art piece, it’s probably a good idea to display it thoughtfully. Choose a spot in your home carefully and think about maybe giving it its own pedestal or lightning. If it isn’t intentionally displayed, it might end up looking a bit misplaced.

4. Do you love it today?

Your style grows with you. With age and experience, some things in your taste are going to become more refined, you grow into having favorite artists, poets, and writers. This is a really great thing when it comes to choosing art for your home, but it is also incredibly important to remember that it is fine to change your mind. Nobody loves the same things forever.

You can think about your art style in the same way as your fashion style. Your fashion has probably gone through some really big changes over the years, mine definitely have! Trends in home decor and art changes just the same as in fashion. If you saw a sweater you loved today wouldn’t you buy it? Who cares if it still fits you in 5 years if it makes you happy today!

Good art challenges us, sometimes we grow and move away from certain ascetics and that’s completely fine. On the other hand, it is difficult to move away from something that used to be important in the past. If you want to find art that feels new and fresh, then you have to challenge yourself. You have to go to new places and try new things. I really encourage you to go to art exhibitions or museums. The more art you consume the better your understanding of your own preferences will be.

5. Can you make your own art?

I can promise you that feels more like an extension of you, then to do your own artwork. Since I mentioned the fact that anything can be art, there are really no excuses for not making art. As long as you think its fun just go for it.

So if you can’t find art you want, consider making it yourself! Although it’s important to have realistic expectations. Don’t expect the first artwork you make to be a masterpiece. Sometimes it takes time to turn an idea into reality.

Check out my blog posts about painting if you are looking for more inspiration.

DIY Home Decor Crafts Design Free Art Print Digital Download

DIY Home Decor Crafts Design Free Art Print Digital Download
DIY Home Decor Crafts Design Gallery Wall guide Digital Download

If you are hands-on looking for new art, please check out my art printables for sale at the SelectedCraftsStore! Or consider joining my newsletter, I send out FREE art prints on a monthly basis 🙂

I hope you have enjoyed this blog post and let me know your best tips to find art that you love!

How to make basil last forever

A beautiful life is not only a life that looks good, it’s also one that feels and tastes good. One of my favorite ways to solve both problems is to decorate with herbs. Any kitchen instantly feels more inviting and beautiful with fresh herbs. So in this blog post, I will teach you a fail-safe way to make your basil last forever.

I make basil propagation from cuttings and this is very simple to do. I think that it might be more of a survival skill than a decorating skill.

There are only upsides to having your own supply of basil, you always have a nice smelling and looking kitchen. Not to mention an everlasting source of last-minute-gifts. One of the main reasons I hoard basil is because I cannot live without always having homemade pesto in the fridge. It is just one of those things that makes life worth living.

Let’s find out how to make basil last forever!

Supplies:

  • Store-bought basil plant.
  • Medium size planter.
  • Quality potting-soil whit a good degree of drainage. Ordinary garden soil is too moist for basil.
  • Drainage, like stones or clay pallets.
  • A glass bottle.

Instructions:

1. Make sure you pick a healthy and strong basil plant from the store.


2. To propagate the basil steam, you want to cut an 8cm or 3-inch basil cutting below a leaf node. You should cut the stem 3cm or a 1-inch below the leaf node.

3. If you have any leaves on the leaf node of your cutting, then remove those.

How to make your basil last forever, grow herbs, plats.

4. Place your basil in a glass vase or bottle. I find that glass bottles work best since they stop the cuttings from falling into the water. Use a transparent bottle so you can see when the roots start to grow.

5. Place your basil in a sunny spot until the roots have grown to about 3cm or 2-inches. Depending on the amount of sun it usually takes more than 7-days for the roots to start growing. Please keep in mind that not every cutting will start to grow roots. I find that I usually lose one of five cuttings. Try to keep the leaf nodes above water and change the water every other day.

6. Once the roots on your basil have grown to size, you can plant the cutting in an indoor planter. Make sure the basil is well-drained, I usually put stones in the bottom of the planter. Place the planter in a sunny spot, basil wants direct sunlight. In the beginning, the basil might look a little strange as you add in more cuttings it will start to take shape.

7. Maintain the plant by watering richly every 5 days and then let the soil dry out completely before watering again.

I can’t stress the importance of using a well-drained planter and waiting to water until the soil is completely dry. In my first attempts at growing basil, I caused the roots to start decomposing… it was not pretty.

Also, remember that basil does not last forever. I take cuttings and regrow basil continuously. Because at some point, usually after a couple of months the original cutting will not be able to regrow any more leaves.

If you want to be the first to know about new content like this, then make sure that you sign up for my awesome newsletter.

If you want more content like this straight away check out these blog posts!

Happy basil growing superstars!

How to choose artwork for your home decor

If you are looking to incorporate more artwork into your home decor, it can be a struggle to figure out the best way to do it. I am on a mission to build a beautiful home. So in this blog post, I teach you some really valuable tips I have learned along the way. I will teach you how I choose artwork for every room in my home.

There is a huge difference between a house and a home. Having art in your home is a really important part of making your space personal. Art used right can be an extension of you!

Let’s just start by saying that investing in art is a totally logical thing to do. You can easily take artwork with you when you move, which means that you don’t have to start over from scratch with your home-building process. Having an art collection of your own will make a really big difference in how fast you settle in a new space.

So here are my best tips for how to find the artwork for your home:

The Kitchen

The kitchen is such a central part of the home, some of the best moments in life are experienced here. Its only natural that you would want to make this space feel special.

The biggest problem I find with decorating the kitchen is that you are usually short on space for displaying things. You probably want to use your countertops for cooking and baking and not displaying artwork.

There is usually less wall space in the kitchen than other rooms since a lot of it already is taken up by pantries and overhead cabinets. That’s why I tend to maximize space by using functional artwork. This way the kitchen still looks decorated but doesn’t feel cluttered or cramped.

By functional art, I refer to cooking conversions, wine guides, butcher charts or other types of informational prints. I have these once at home, they make my kitchen decor look very intentional witch I love!

Wine guide kitchen art print
Conversions kitchen art print

beef cuts butcher chart kitchen

The Bedroom

The bedroom is your recreational space, it should feel like a haven of calm and tranquility. Try to focus on art that creates a calm, cozy and inviting feeling. What exactly that means to you may differ somewhat depending on your taste and decorating style.

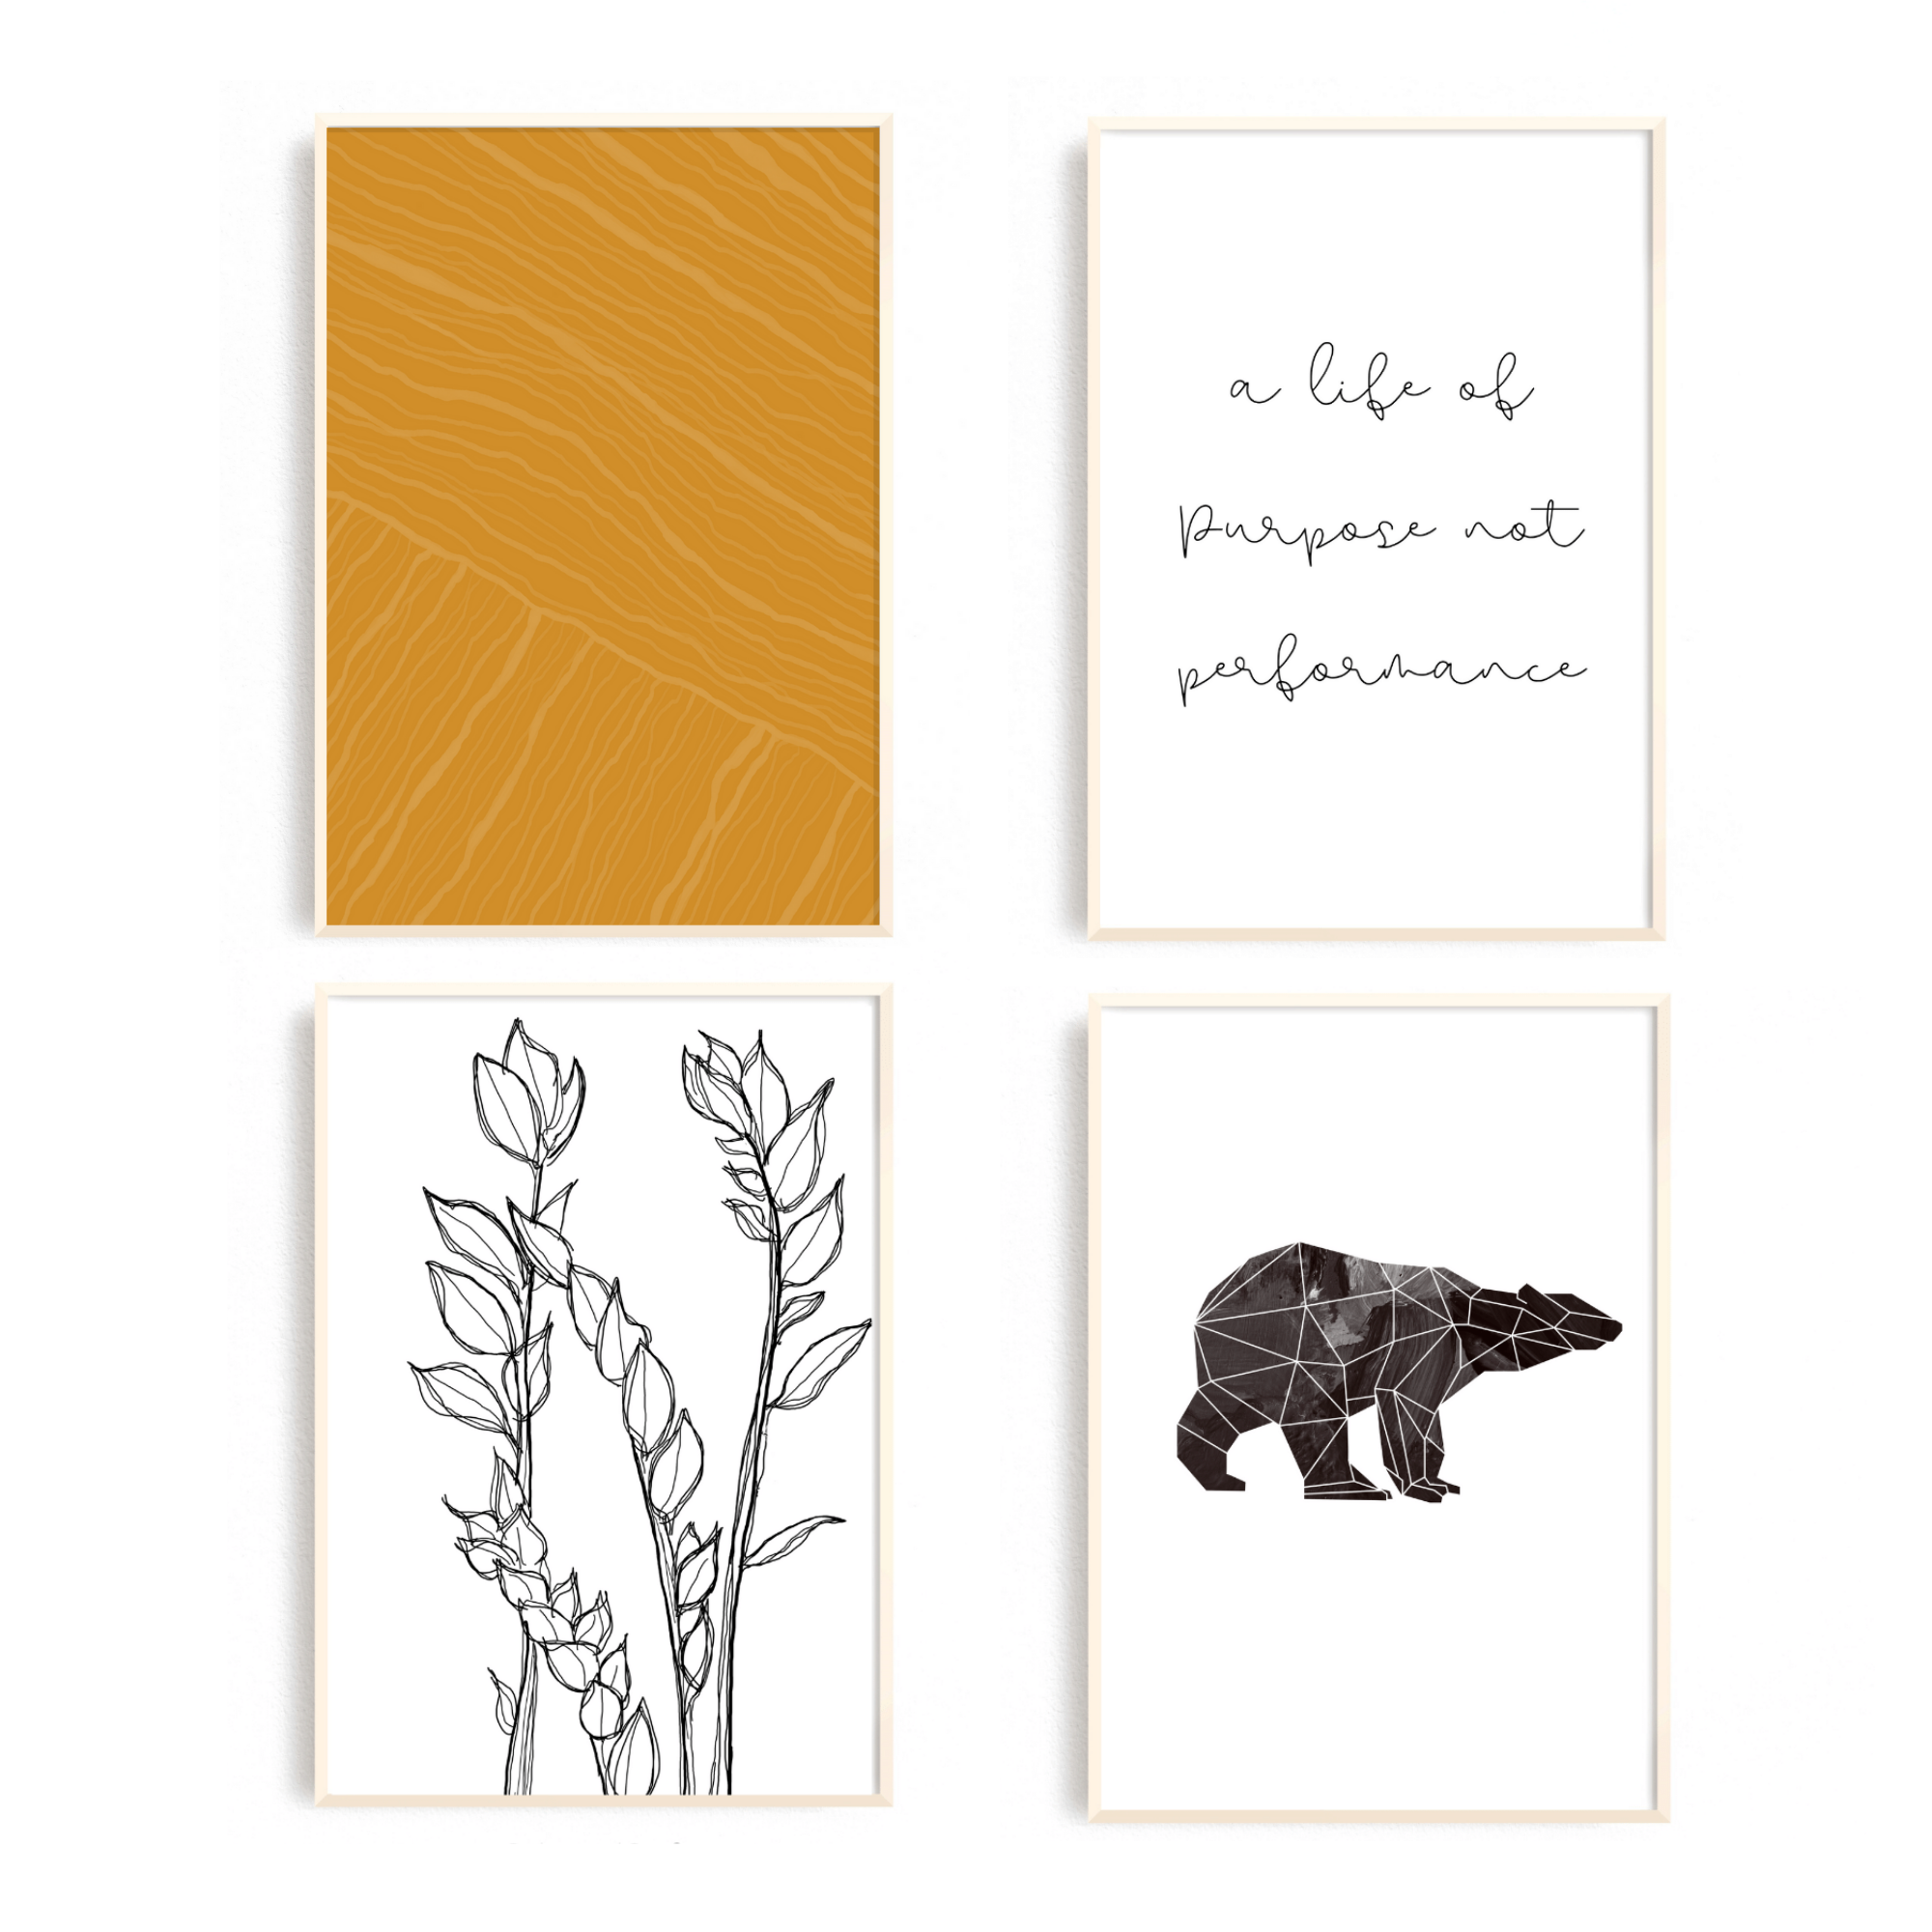
I have a gallery wall with abstract and geometric art prints above my bed and I truly love the look of it. It ties in the colors from my lamps, curtains, and bedding and makes the room look really cohesive. My bedroom gallery wall helps to anchor the whole room.

Here are some examples of the artwork I use!

bedroom art printable

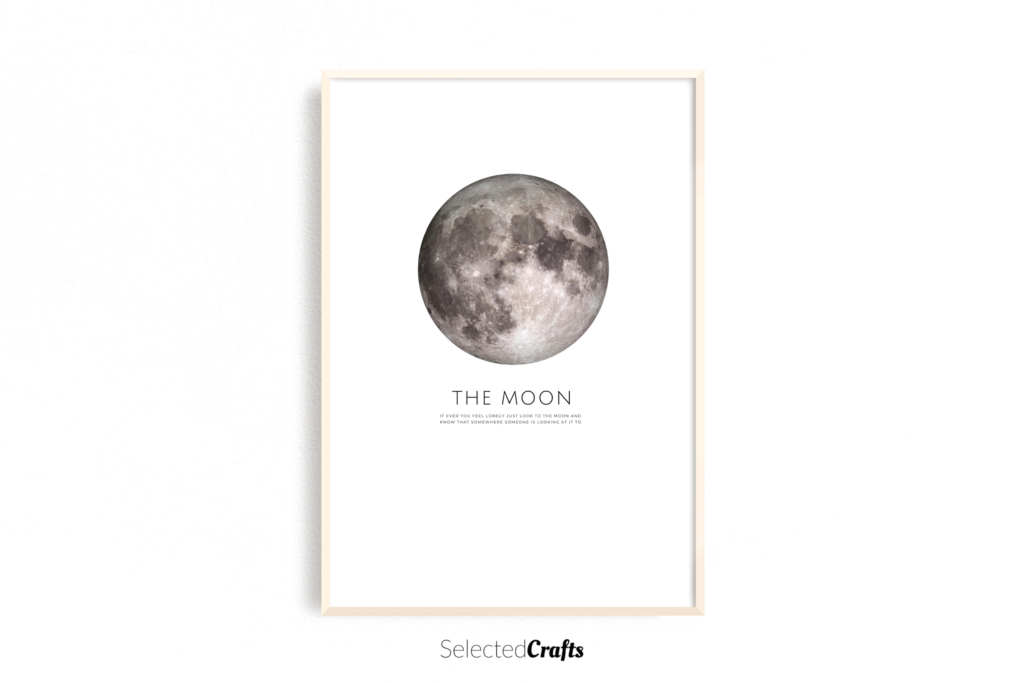
bedroom moon art printable
bedroom quote art printable

The Bathroom

The Bathroom is such a forgotten space when it comes to artwork, most people I know have zero art in their bathrooms. That is such a waste of prime-quality art space! Especially if you are short on space in other rooms.

You might want to be a little careful of the art you bring into the bathroom though. For example, I would not recommend putting an original oil-painting or unframed art print in a bathroom with poor ventilation. In my experience though hanging a framed prints in the bathroom is not a problem at all.

When it comes to artwork in the bathroom I do recommend going for a cozy look or a spa-themed decor. After all, you want to feel completely relaxed in your bathroom.

Here are some examples of artwork that would go well in the bathroom.

typography bathroomart printable artwork for home decor
ocean bathroom art printable artwork for home decor
abstract bathroom art printable artwork for home decor

The Livingroom

This is the room in the house where most people spend the most time. That means it is extra important that the living room expresses who we are. It is also the place where we tend to entertain our guests, which is a good reason to spend some extra time in your living room decor.

You can have a lot of fun with your living room decor but I would recommend going for only a few statement pieces. Bring some really large artwork into space, or build a gallery wall!

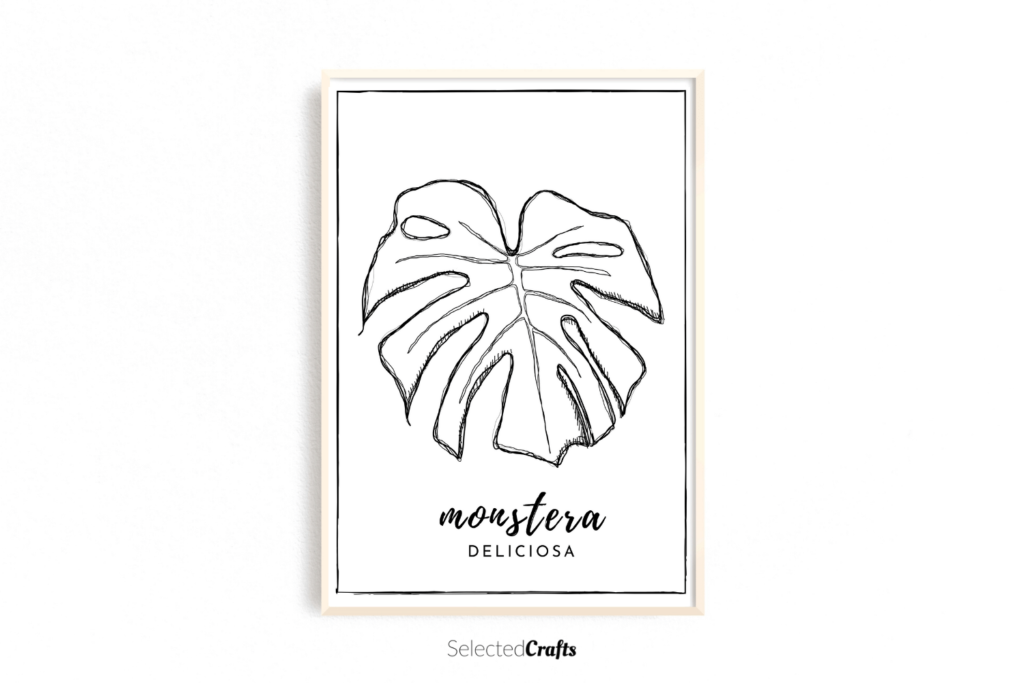
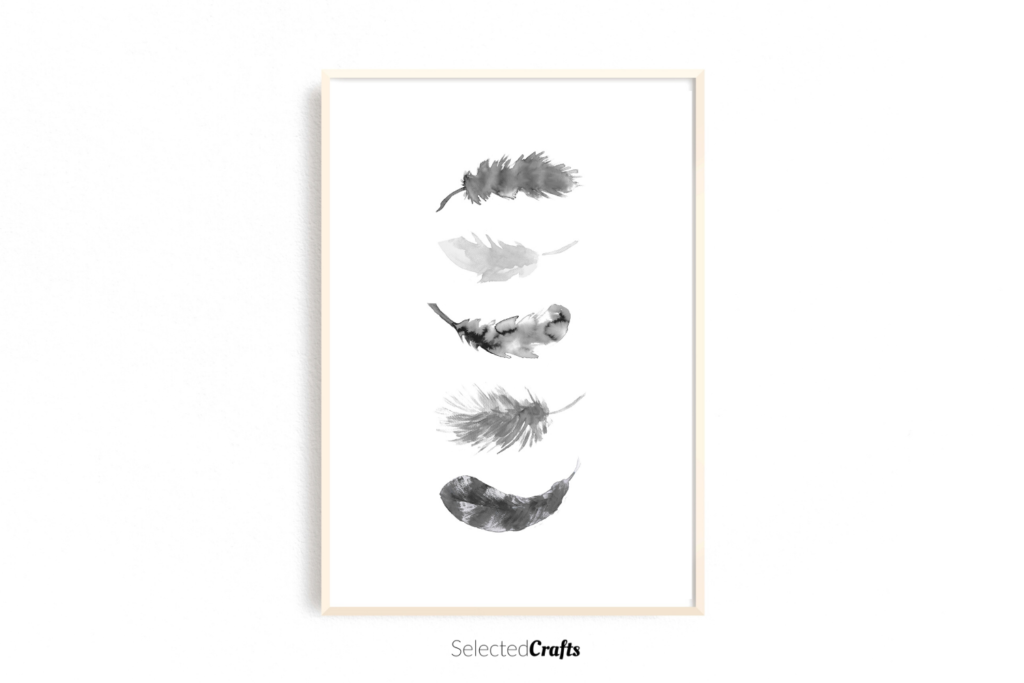
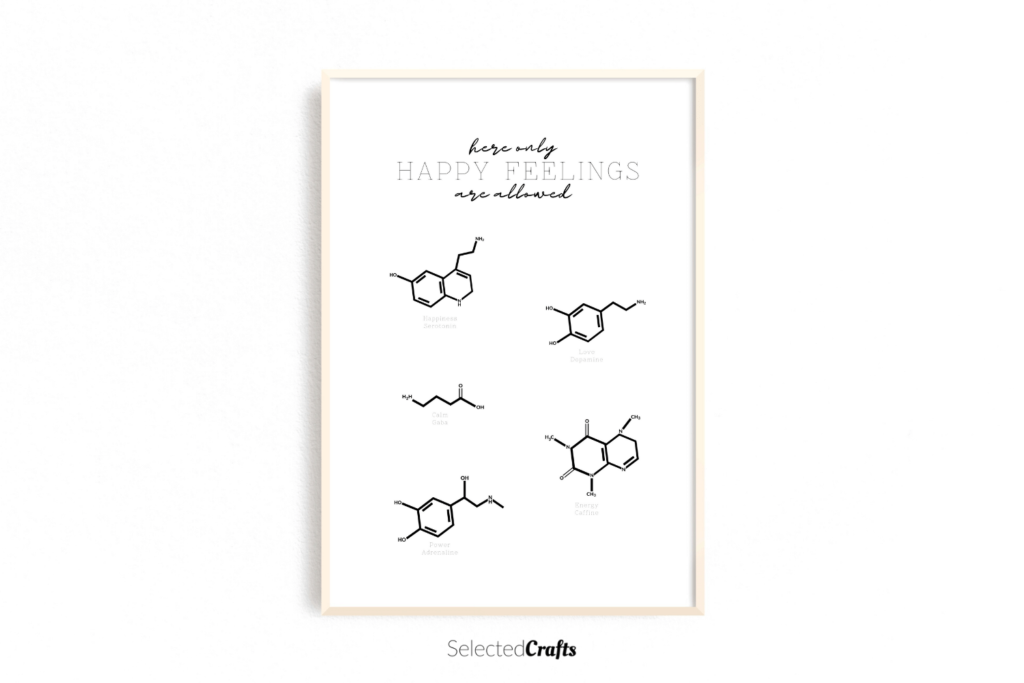
Don’t be afraid to think outside the box, maybe you need a huge mirror or a sculpture in your living room? The living room is the best space to opt for artwork that makes an impact. Here is some example of artwork you could go for!

monstera deliciosa art printable artwork for home decor
watercolor feathers art print artwork for home decor
molucules art printable artwork for home decor

The Office

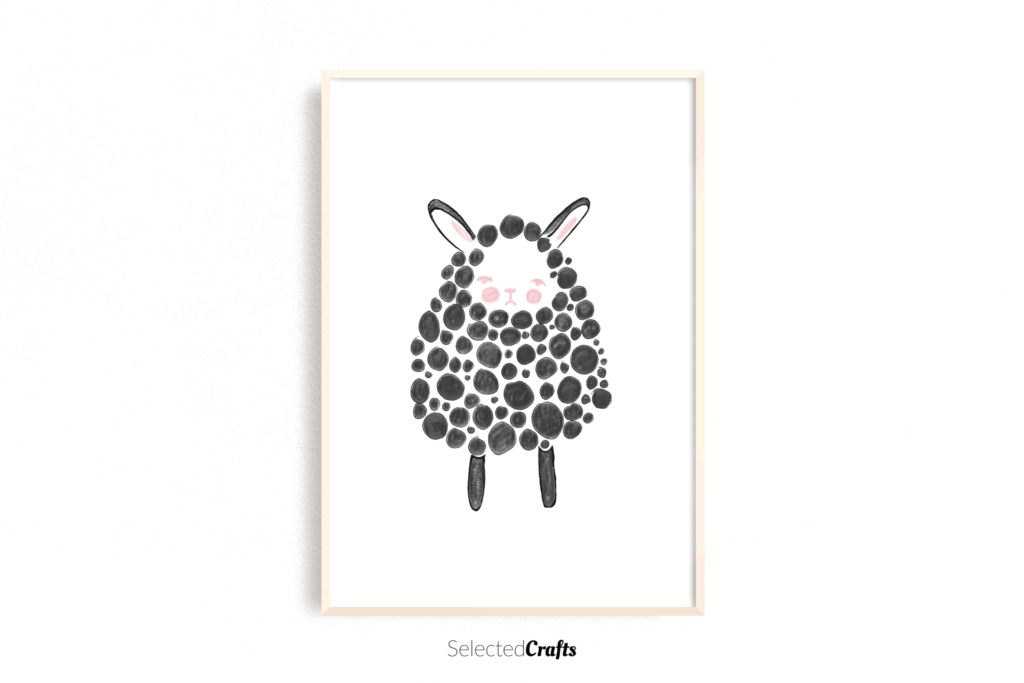
In terms off motives, the office is a really great space, there are really no limitations in this space. The important thing when decorating an office is that you choose artwork that inspires you, especially if you work a lot in this space. If what inspires you are abstract art, puppies or photos of your family, it does not really matter as long as it makes you feel good. A personal favorite for me is inspirational quotes such as these goodies.

Quote art printabale for home decor
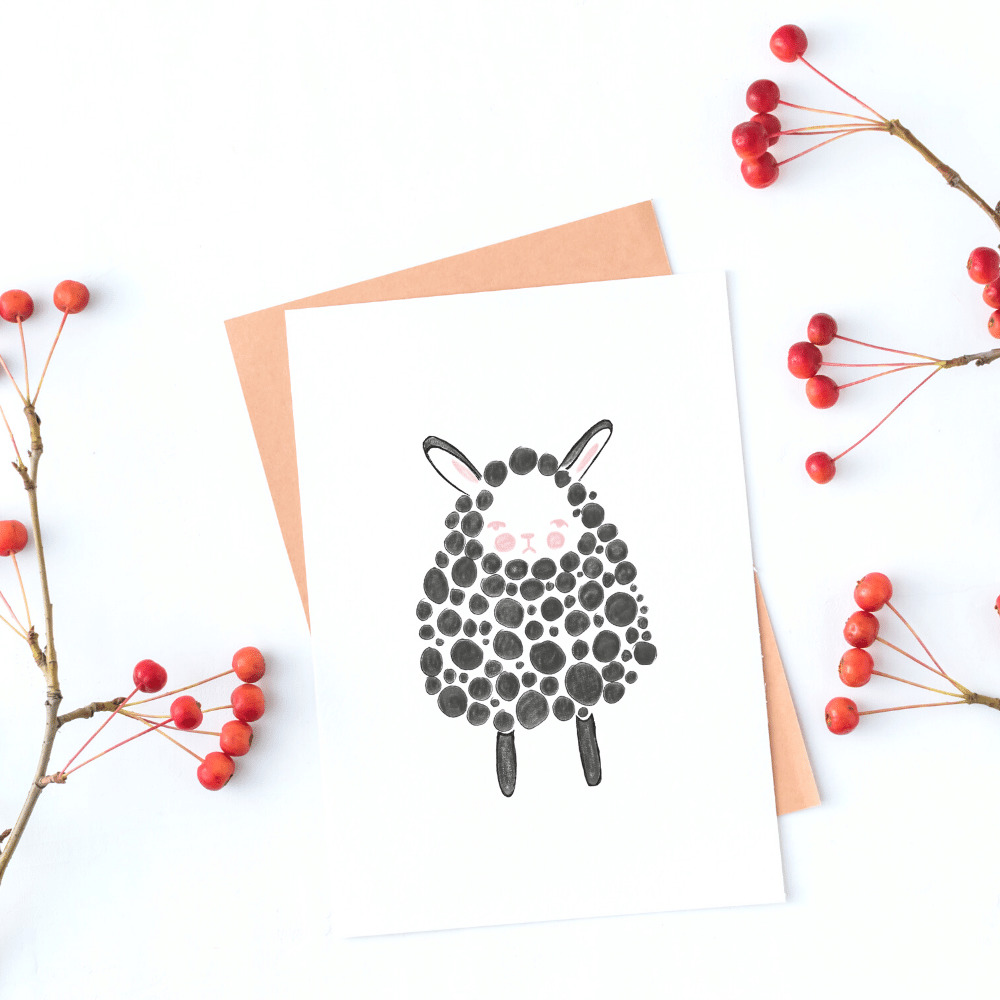
sheep art printable for home decor
Typography art print for home decor

Artwork in other parts of your home decor

If you have additional space such as a nursery or an entryway these are also perfect spaces for artwork. The most important thing to keep in mind is to find a good balance between form and function in your home decor. For example, I have a very narrow hallway! Because I don’t want to make it feel even more narrow, I prefer to keep the walls plain. However, if you are one of those lucky people who have space in your entryway, just go for it!

The nursery is also a very important place to decorate. In terms of nursery decor, I would recommend sticking to a theme of colors or motives such as tropical or arctic animals. A Nursery should be a sensory environment that does not overwhelm yet stimulates. As your kids grow, you might want to bring in some educational elements to for example an alphabet poster. I do not personally have a nursery yet, but I still think it is a very important space to decorate. After all its not just for you but for your little one as well!

artwork for home decor
pink sheep art printable digital download artwork for home decor
line art digital download printabel artwork for home decor

If you want more tips on how to build a gallery wall, check out this blog post and get your copy of the FREE Gallery wall guide. This is a step-by-step guide that will take you from dream to reality in no time!

Or check out these Free Art Printables that will update your space in no time!

DIY Home Decor Crafts Design Free Art Print Digital Download

DIY Home Decor Crafts Design Free Art Print Digital Download
DIY Home Decor Crafts Design Gallery Wall guide Digital Download

Please let me know if this was helpful to you 🙂 Feel free to leave a comment down below and the best of luck with finding your artwork!